Configure Okta for OIDC SSO
Introduction
Okta is an Identity and Access Management solution that can be used for OIDC Single Sign-On (SSO) with the CIS SecureSuite Platform.
This guide explains how CIS SecureSuite Platform System Admins can configure Okta as their organization's identity provider for SSO.
Prerequisites
Ensure the following prerequisites have been met before proceeding.
| Item | Requirement |
|---|---|
| Okta role | Super Admin or Application Admin in the target Okta organization |
| CIS SecureSuite Platform role | System Admin role |
| Secret storage | A password manager or vault ready to store the client secret immediately |
Steps
1. Create and configure OIDC application.
2. Collect credentials and endpoints
3. Assign users and groups to application.
4. Connect Okta application to the CIS SecureSuite Platform.
Tip
We recommend having the CIS SecureSuite Platform opened and on the IdP page in Admin. You will want to copy/paste values from the IdP to the CIS SecureSuite Platform and vice versa.
Create and configure OIDC Application
Start by creating and configuring the OIDC application in Okta.
1. Log in to your Okta account.
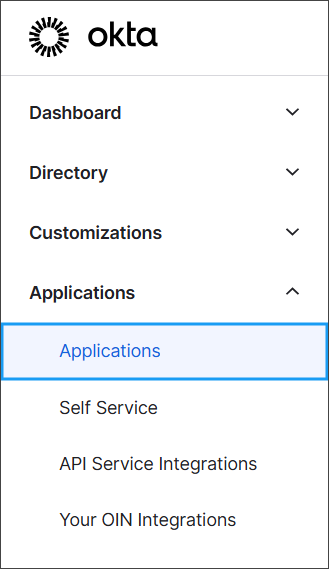
2. From the left navigation, go to Applications > Applications.
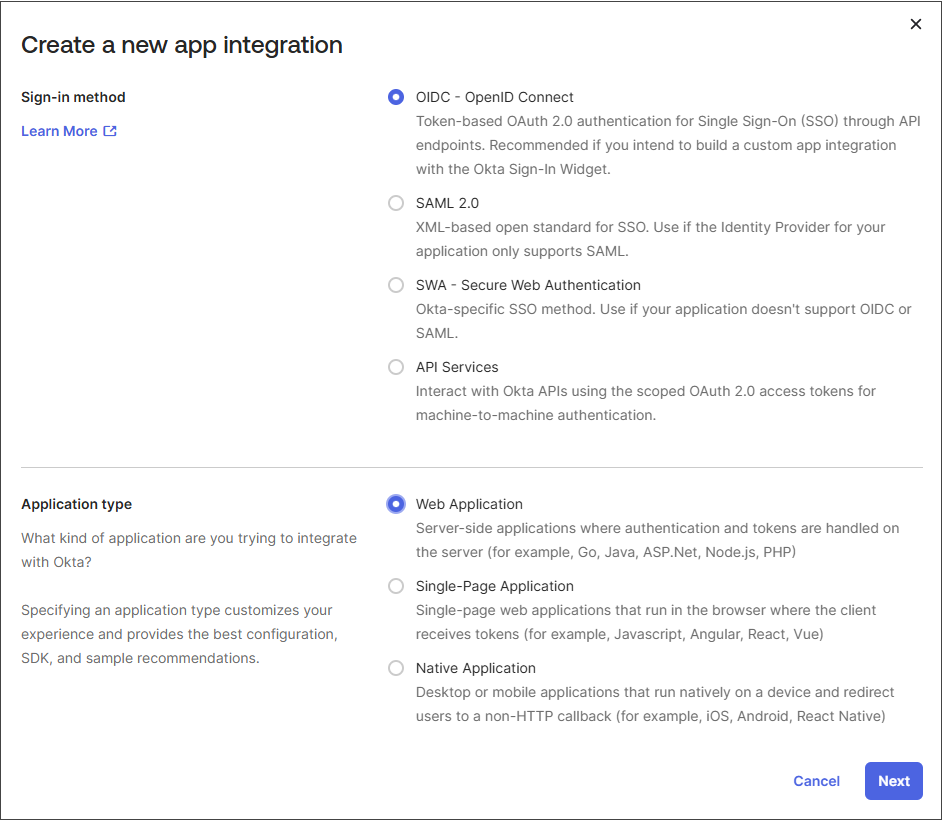
3. Select Create App Integration.

4. Select OIDC - OpenID Connect, Web Application and then Next.
5. Set the App integration name.
6. Copy the Sign-in redirect URI and Sign-out redirect URI from the IdP page of the CIS SecureSuite Platform and paste the values in their respective fields in Okta.
7. Configure access.
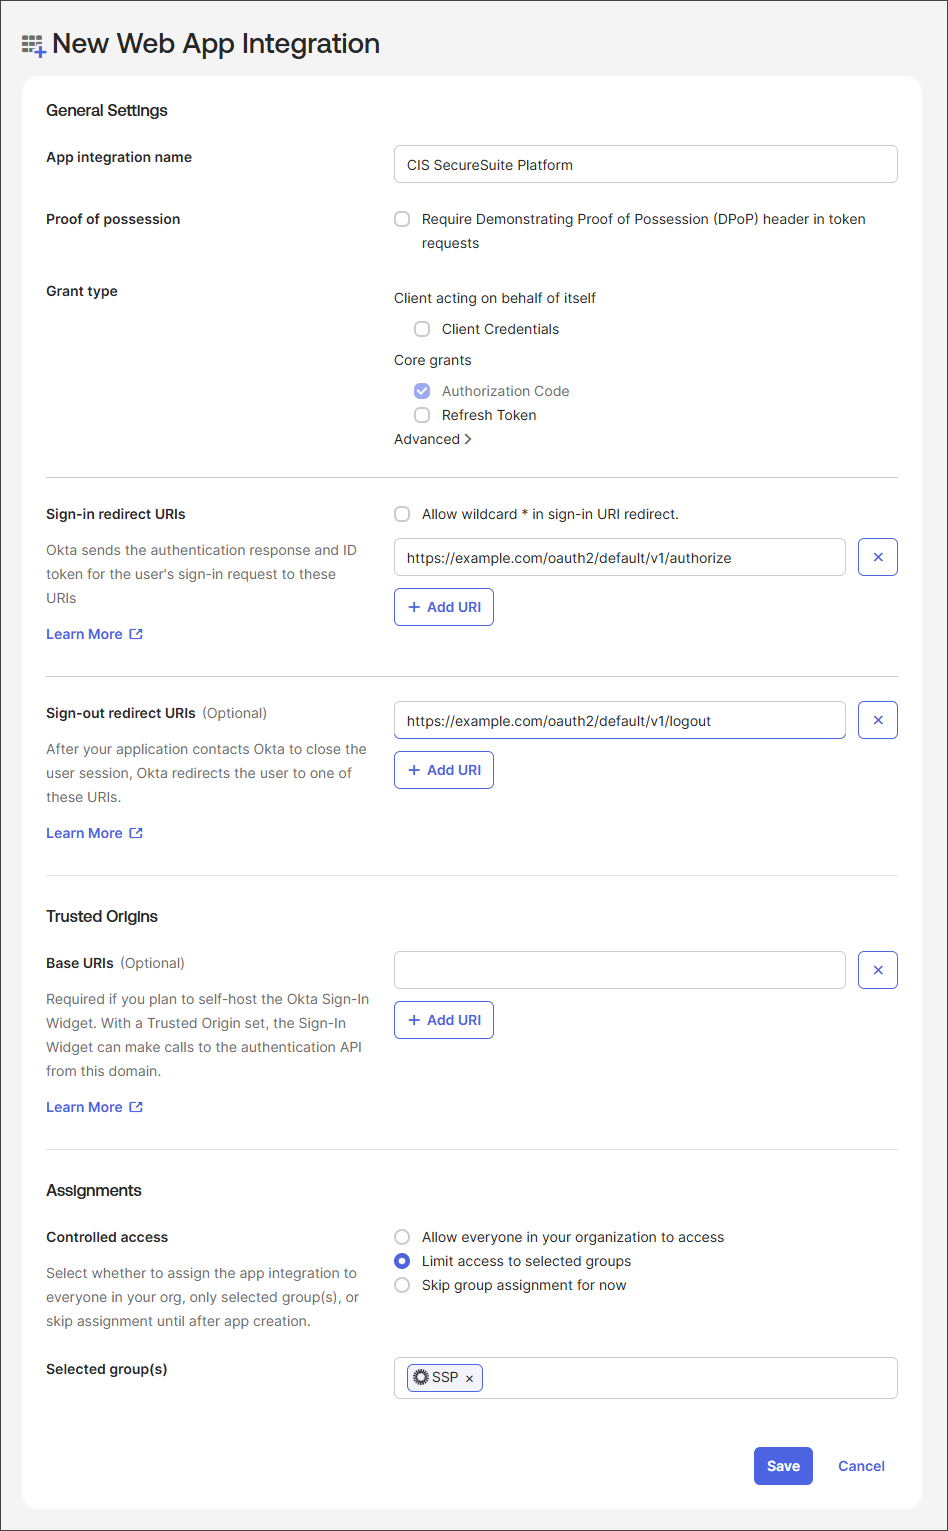
8. Select Save when finished.
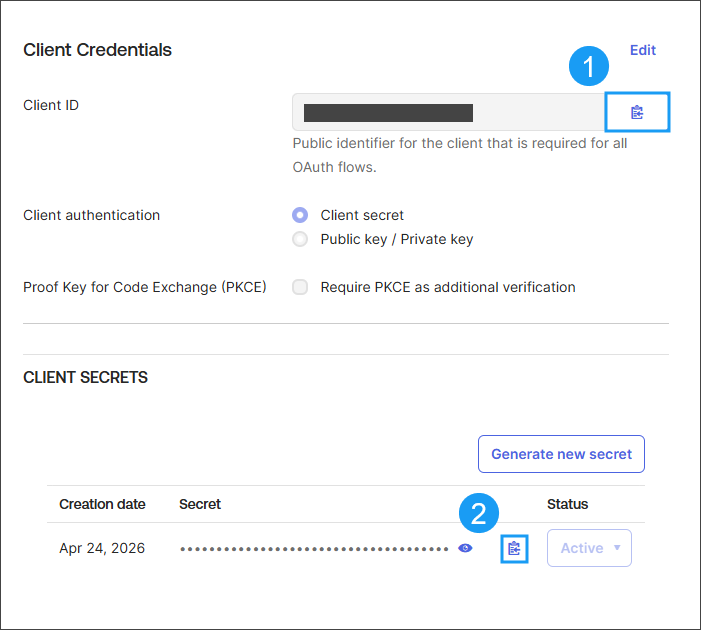
You will land on the OIDC application's General tab, where you can get the Client ID and Client Secret.
9. Select Require PKCE as additional verification to safely authenticate users and protect client applications from code interception attacks.
Collect Credentials and Endpoints
Next, get the values that you will enter or copy/paste into the CIS SecureSuite Platform.
1. Under Client Credentials, copy the Client ID.
2. Copy the Client Secret and paste it into your team's vault for safe keeping.
3. Go to Security > API > Authorization Servers.
4. Select the default server or, if applicable, the dedicated server created for the CIS SecureSuite Platform.
5. Copy the Issuer URI base URL (e.g., https://your-org.okta.com from https://your-org.okta.com/oauth2/default).
6. Add /.well-known/openid-configuration to the end of the base URL to get the discovery endpoint.
https://your-org.okta.com/.well-known-openid-configuration
Assign Users and Groups to Application
All users who need to log in to the CIS SecureSuite Platform via Okta must be assigned to the app. Unassigned users receive an access error.
1. In the Okta application, select Assignments.
2. Select Assign > Assign to Groups.
3. Search for and select the group(s) whose members should have access.
4. Select Done.
Connect Okta Application to the CIS SecureSuite Platform
Finish setting up SSO with Okta by connecting the IdP to the CIS SecureSuite Platform.
1. Open the CIS SecureSuite Platform.
2. Go to Admin > IdP.
3. From the External Identity Provider dropdown, select OIDC.
4. Complete the fields by providing the discovery endpoint, client ID, and client secret.
Tip
Refer to the Connect with OIDC procedure for detailed instructions on this step.
5. Select Submit to establish the connection.