Integrations
The Integrations area of CIS SecureSuite Platform is where organizations can review select data from their integrated applications.
Action1
The Action1 integration connects the CIS SecureSuite Platform to Action1, a cloud-native endpoint management platform specializing in patch management and vulnerability remediation. Once connected, live Action1 data appears in a dashboard within the CIS SecureSuite Platform, so you can review your endpoint patch and vulnerability status without leaving the CIS SecureSuite Platform.
This guide covers:
- Before You Begin
- Connect Action1
- View the Action1 Dashboard
- Update Action1 Credentials
- View Action1 Activity
- Disconnect Action1
- Troubleshoot Action1
Before You Begin
Complete the following before connecting Action1:
- Have an Action1 license. Certain Action1 editions offer a no-cost solution for up to 200 endpoints. See Action1 website for more information.
- Ensure your system is online
- As a System Admin, turn on Integrations in Admin > System Settings > Additional Features. See Integrations.
- Sign in to the CIS SecureSuite Platform as a System Admin to connect, update, or disconnect an integration.
- Gather the following from your Action1 account:
- Client ID: The Client ID of your Action1 API credentials.
- Client Secret: The Client Secret of your Action1 API credentials.
- Organization ID: The ID of the Action1 organization whose data you want to view.
- Region: The Action1 region that hosts your account: North America, North America 2, Europe, or Australia.
Note: The CIS SecureSuite Platform has read-only access to Action1. It does not install updates or make changes in Action1.
Connect Action1
- Navigate to the "Other" section of the side panel and select Integrations.
- Filter the list by NIST security function (All, Govern, Identify, Protect, Detect, Respond, Recover) or by connection status.
-
Select the Action1 tile.
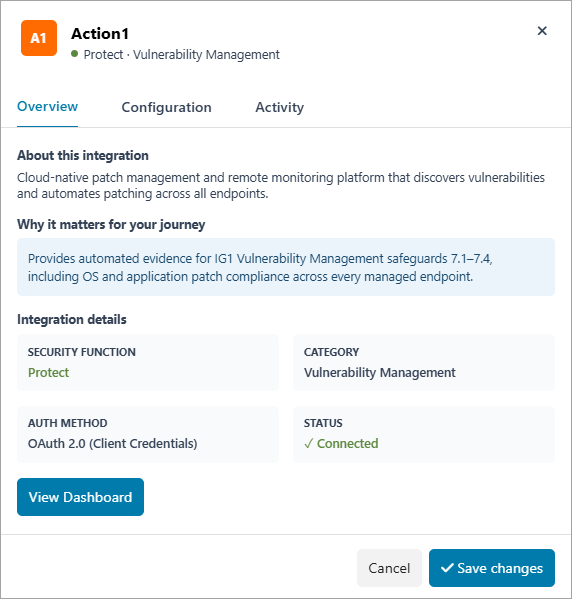
-
Select the Configuration tab.
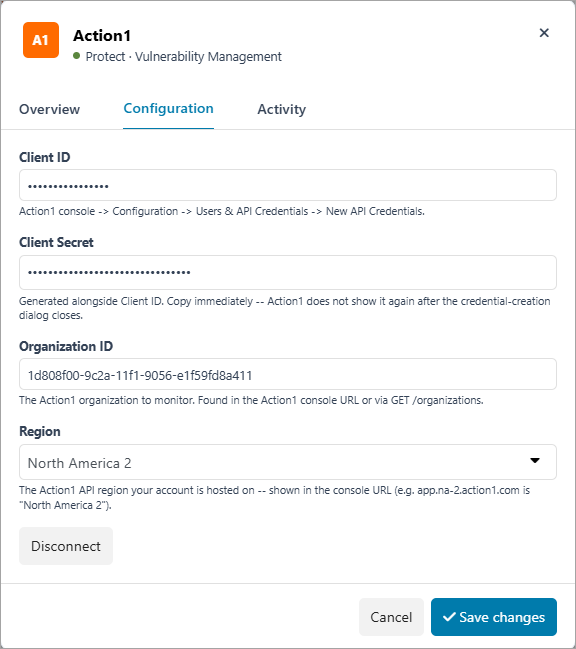
-
Enter the following:
- Client ID: Enter your Action1 Client ID.
- Client Secret: Enter your Action1 Client Secret.
- Organization ID: Enter your Action1 Organization ID.
-
Region: Select the region that hosts your Action1 account. The default is North America.
-
Select Save changes.
The CIS SecureSuite Platform verifies your credentials with Action1. While verifying, the button reads Connecting....
When the connection succeeds, the Action1 tile displays a green Active badge, and Action1 appears in the "Integrations" section of the left navigation for all users.
If the connection fails, an error message displays on the Configuration tab and no connection is created.
Note: Your Client ID and Client Secret are encrypted when saved and never displayed again.
View the Action1 Dashboard
All users can view the Action1 dashboard once Action1 is connected.
- Navigate to the "Integrations" section and select Action1.
You can also open the dashboard from the catalog. Select the Action1 tile, and then select View Dashboard on the Overview tab.
The dashboard loads your Action1 data. Select Launch Action1 to open Action1 in a new tab.
Note: The dashboard displays data from Action1 that is stored for up to 30 minutes. This protects your Action1 account from exceeding Action1's API rate limit. When you reload the dashboard within 30 minutes of the last load, the data you see may not include the most recent changes in Action1.
No Endpoints Found
If Action1 returns no managed endpoints, the dashboard displays a Getting started with Action1 message with an Install Agent link. The data behind the message is blurred. Select Install Agent to go to Action1 and install the Action1 agent on your endpoints. Endpoints appear in the dashboard after the agent is installed and the cached data refreshes.
Cybersecurity Journey Scorecard
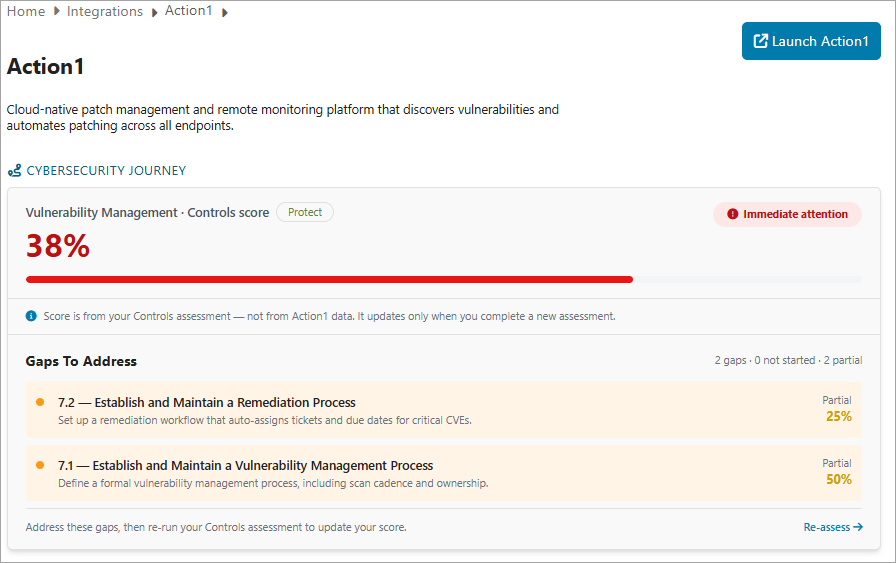
If you have completed a CIS Controls assessment and have loaded My Journey, the dashboard displays a Vulnerability Management score card. The score card shows:
- The security function (Protect) and the category (Vulnerability Management).
- Your Vulnerability Management score and an attention level, for example IMMEDIATE ATTENTION.
- The number of gaps to address, and how many are not started or partially implemented.
- Guidance for each outstanding safeguard. Safeguards that are fully implemented are not listed.
The scorecard display depends on your access and your Journey status:
- You have not loaded a controls assessment: The score card displays NOT YET MEASURED at 0%, with a link to enable My Journey and get specific recommendations.
- You do not have an Org Admin or Full User role for the organization: The score card is not displayed.
- My Journey is turned off in System Settings: The score card is not displayed.
The score card is based on your own My Journey data. Other users may see different information, or no score card at all.
Managed Endpoints and Missing Updates
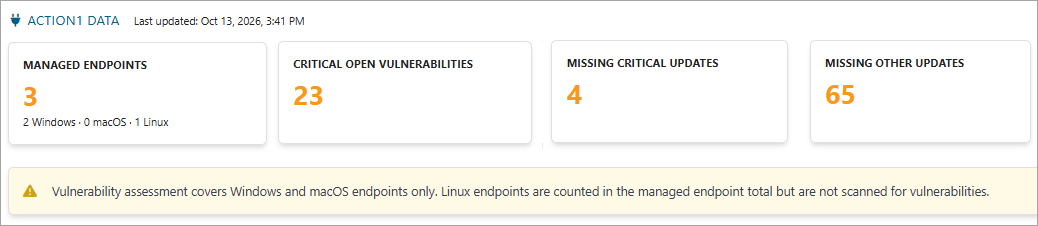
The summary tiles at the top of the dashboard show:
- Managed Endpoints: The number of endpoints managed in Action1, broken down by operating system (Windows, macOS, and Linux).
- Critical Open Vulnerabilities: The number of open vulnerabilities rated critical.
- Missing Critical Updates: The total number of critical OS and software updates that have not yet been installed across all endpoints.
- Missing Other Updates: The total number of non-critical updates (for example, optional or feature updates) that have not yet been installed across all endpoints.
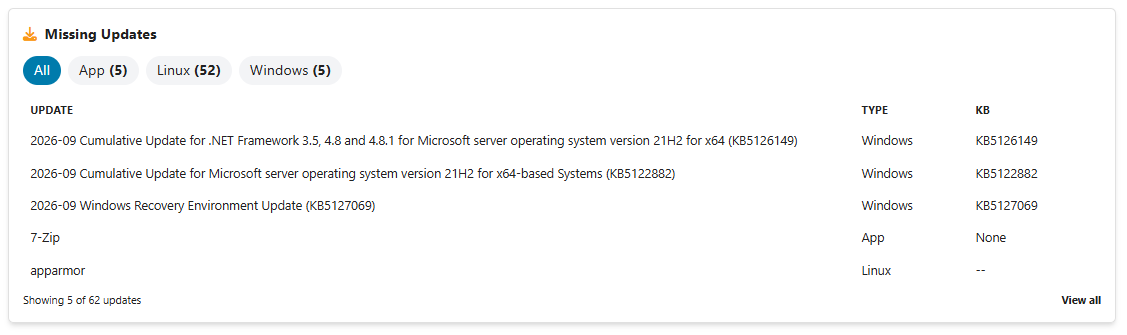
Missing Updates
The Missing Updates section lists updates that have not yet been installed on your endpoints.
Open Vulnerabilities by Severity
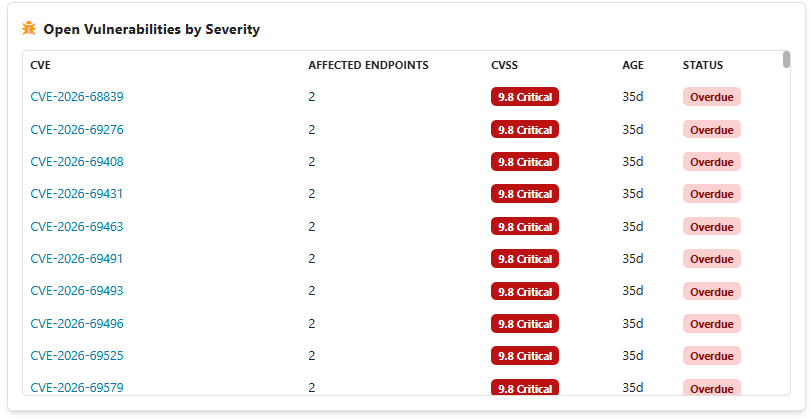
The Open Vulnerabilities by Severity table lists open vulnerabilities found on your endpoints:
- CVE: The Common Vulnerabilities and Exposures (CVE) identifier of the vulnerability.
- Affected endpoints: The number of endpoints affected by the vulnerability.
- CVSS: The severity of the vulnerability, including its CVSS score.
- Age: The age of the vulnerability.
- Remediation status: The remediation tracking state of the vulnerability, as reported by Action1:
- Overdue: Remediation is past due.
- Due Soon: Remediation is due soon.
- Not Required Yet: Remediation is not yet required.
- Compensated: A compensating control is in place.
Remediation Pipeline
The Remediation Pipeline section lists your Action1 automation schedules and their run history:
- Name: The name of the automation schedule.
- Next run: When the automation is next scheduled to run.
- Last run: When the automation last ran.
- Status: The result of the most recent run.

If your Action1 account has no automation history, an empty state displays instead.
Update Action1 Credentials
Update your credentials when your Action1 API credentials change, or if you need to connect to a different Action1 organization or region.
- Go to "Other" section of the side menu and select Integrations.
- Select the Action1 tile.
- Select the Configuration tab.
- Update the fields you need to change.
- Select Save changes.
The CIS SecureSuite Platform verifies the new credentials with Action1 and, if successful, saves them. If you did not change any fields, selecting Save changes closes the window without making any changes.
View Action1 Activity
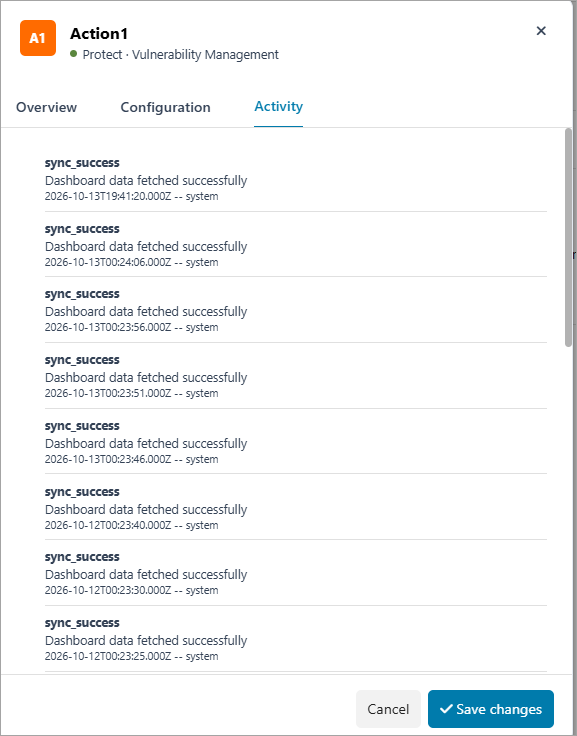
The Activity tab lists events for the Action1 connection, including who performed each event and when. The tab is available only while Action1 is connected, and only to System Admins and Org Admins.
- Go to "Other" section of the side menu and select Integrations.
- Select the Action1 tile.
- Select the Activity tab.
Events include:
- Connected: Action1 was connected.
- Config updated: The Action1 credentials were updated.
- Sync success: Data was successfully retrieved from Action1 for the dashboard.
- Sync error: Data could not be retrieved from Action1 for the dashboard.
Disconnect Action1
Disconnecting Action1 removes the connection for the entire CIS SecureSuite Platform instance.
- Go to "Other" section of the side menu and select Integrations.
- Select the Action1 tile.
- Select the Configuration tab.
- Select Disconnect.
The page reloads. The Active badge is removed from the Action1 tile, and Action1 is removed from the INTEGRATIONS section of the left navigation for all users.
Important: Disconnecting Action1 deletes the saved credentials and the connection's activity history. If you connect Action1 again, you must re-enter your credentials and the activity history starts over.